Configuring Preside on iPadOS
In an earlier post I wrote about how I replicated a HEY-style workflow with other email applications.
I thought some detail about how I’ve configured my preferred iPadOS email client, Preside to work in a similar way might be in order.
Preside is an amazing power-user email application for iOS. The application features a myriad of options. The hardest thing about configuring Preside is knowing where the particular setting or customisation might be found within its many nested folders of preferences and settings. What I have found is that my configuration has taken some time and has come together piece-by-piece as I discover another element of Preside’s functionality. Even now, I don’t consider my customisation of Preside done. I’m sure I will continue to tweak it.
I’m going to focus on my use of Preside on iPad. While Preside works just the same on iPhone, its settings don’t sync across the platforms. It’s been so hard to get the iPad settings right that I don’t even want to try to replicate it on iPhone. But there’s nothing stopping my approach from working on either platform. I beg of developer Rich Waters - please give us some method to sync settings!
With that preamble taken care of, on with the show.
Dashboard View
My Preside dashboard looks as such:
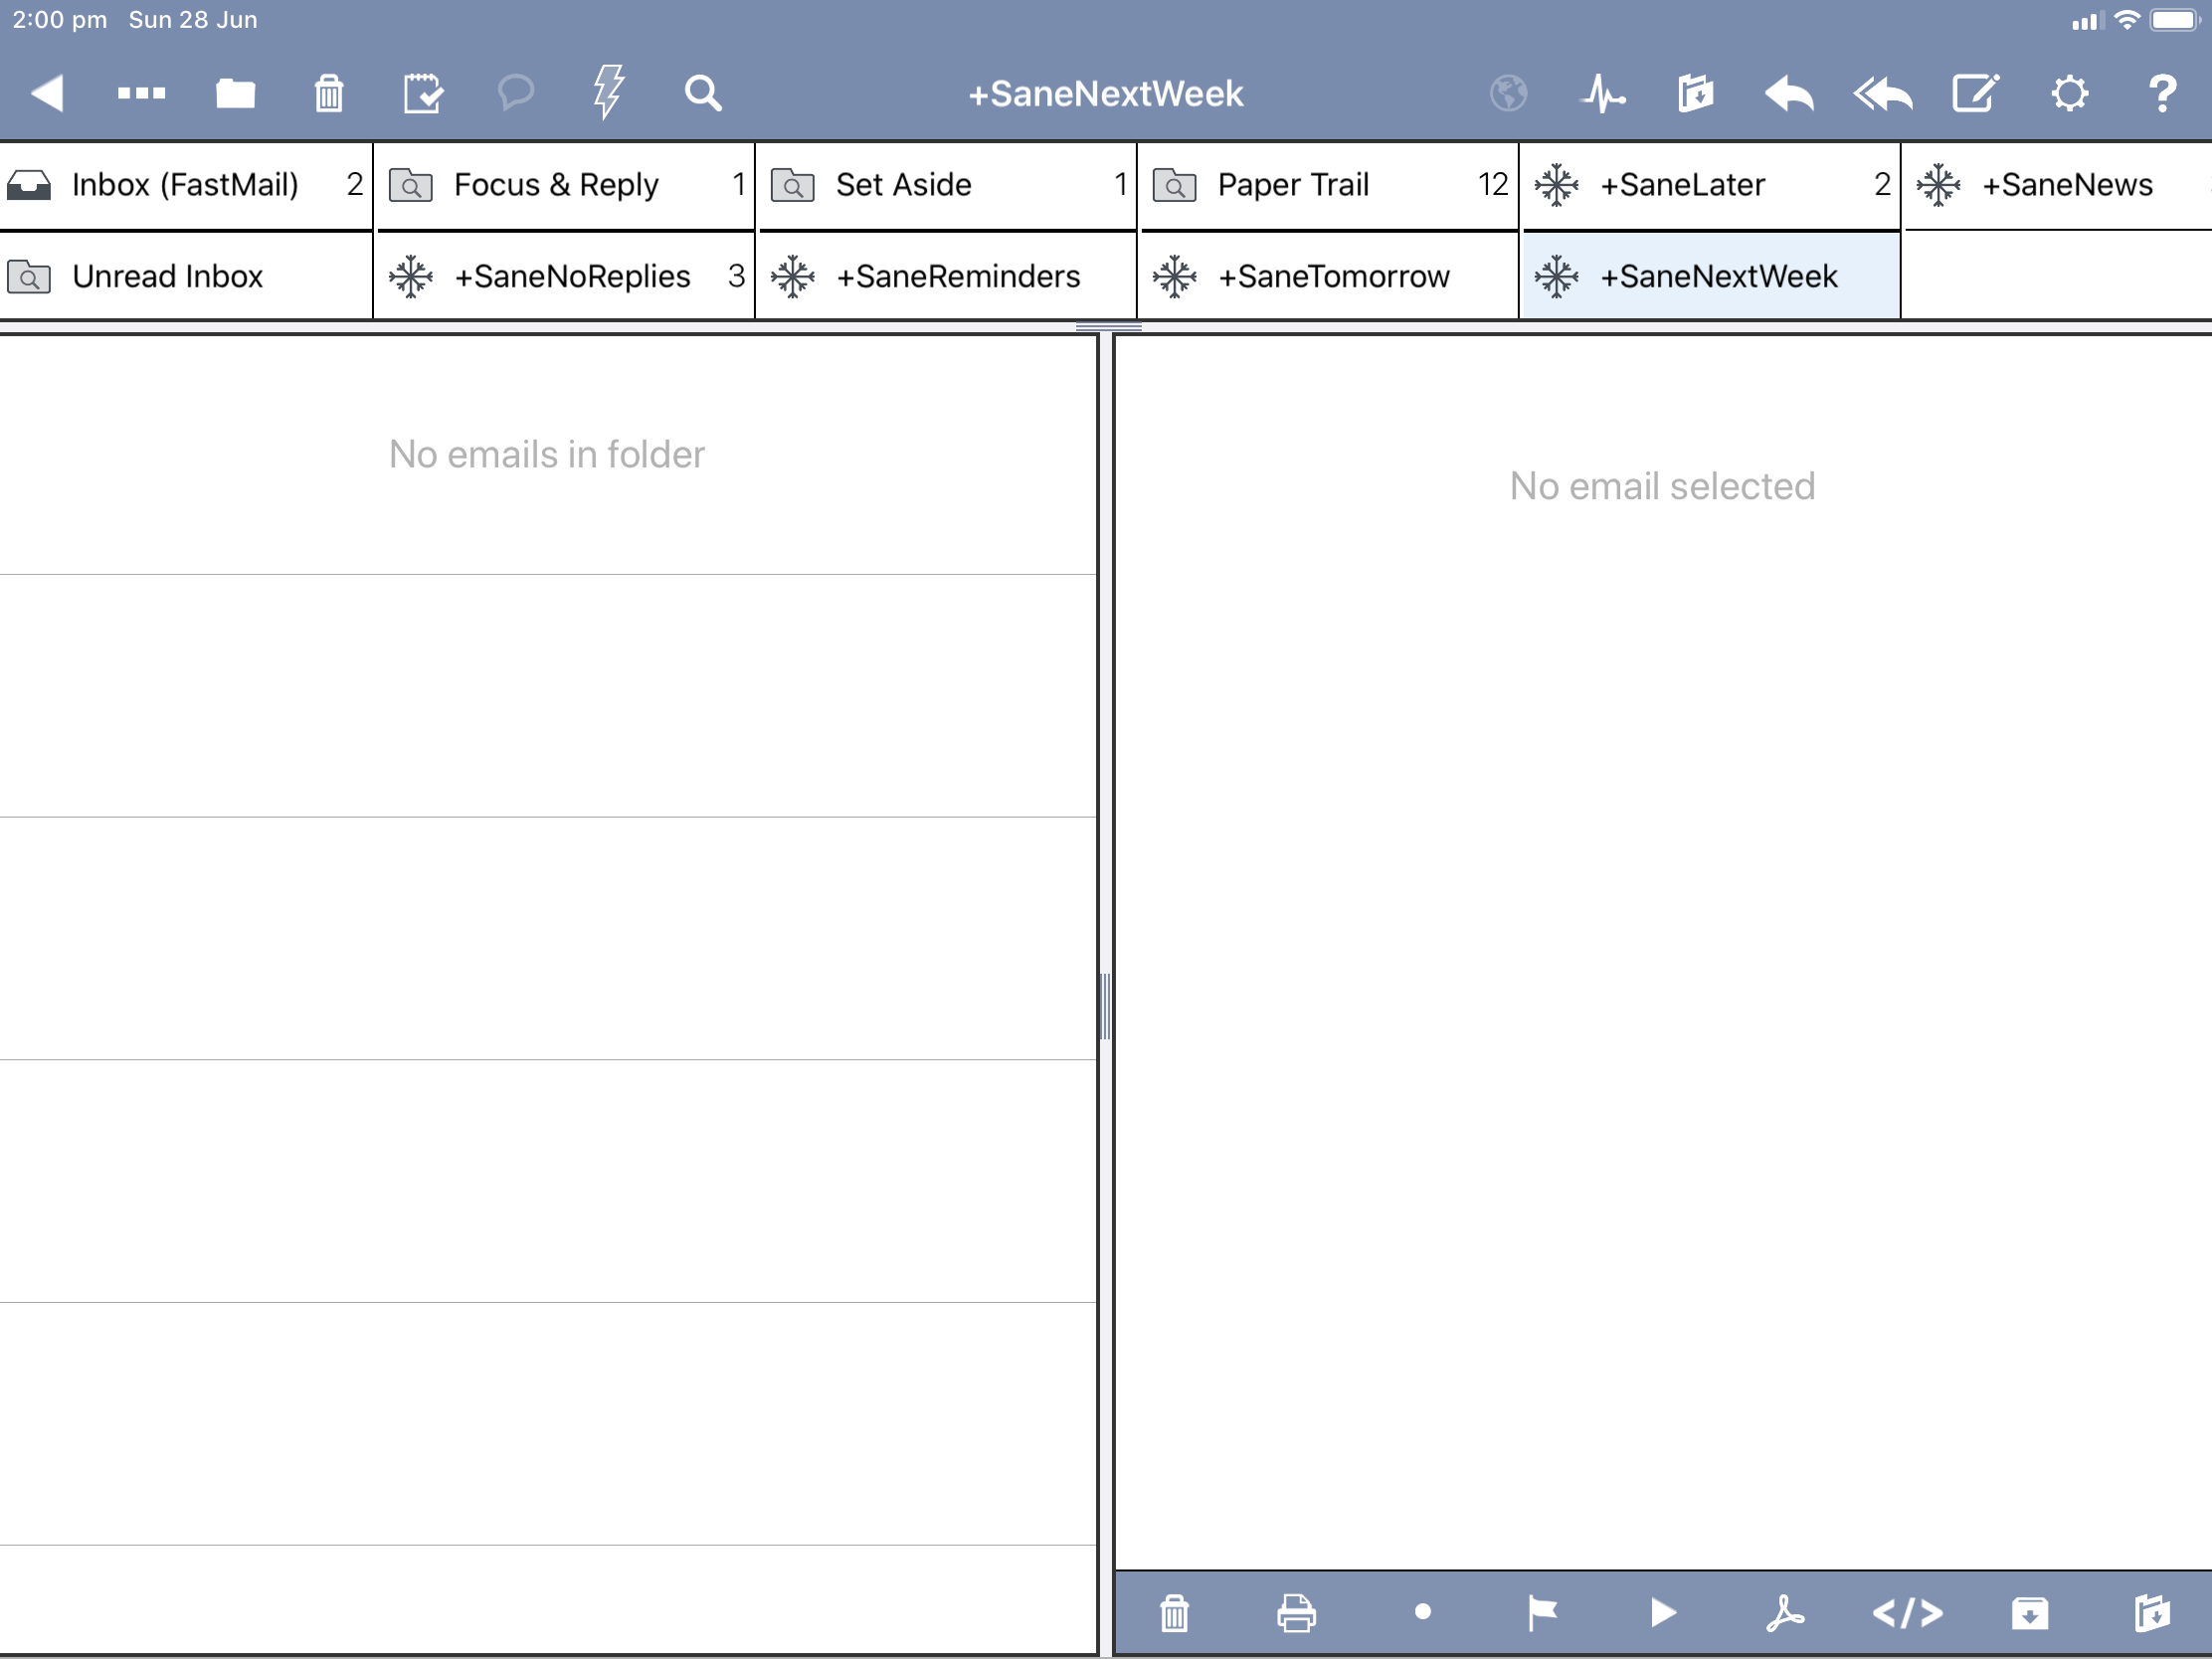
You see a number of favourite folders and smart searches across the top. A list view of emails down the left hand sidebar and the email content on the right.
How did I get the setup to look exactly this way? I wish I could tell you. Again, with Preside’s settings being so deep, I can’t exactly remember what toggles I flipped to get it looking this way. I’m sorry. I wish I could do better.
I can only show the following setting screen that shows how I have enabled the smart search folders:
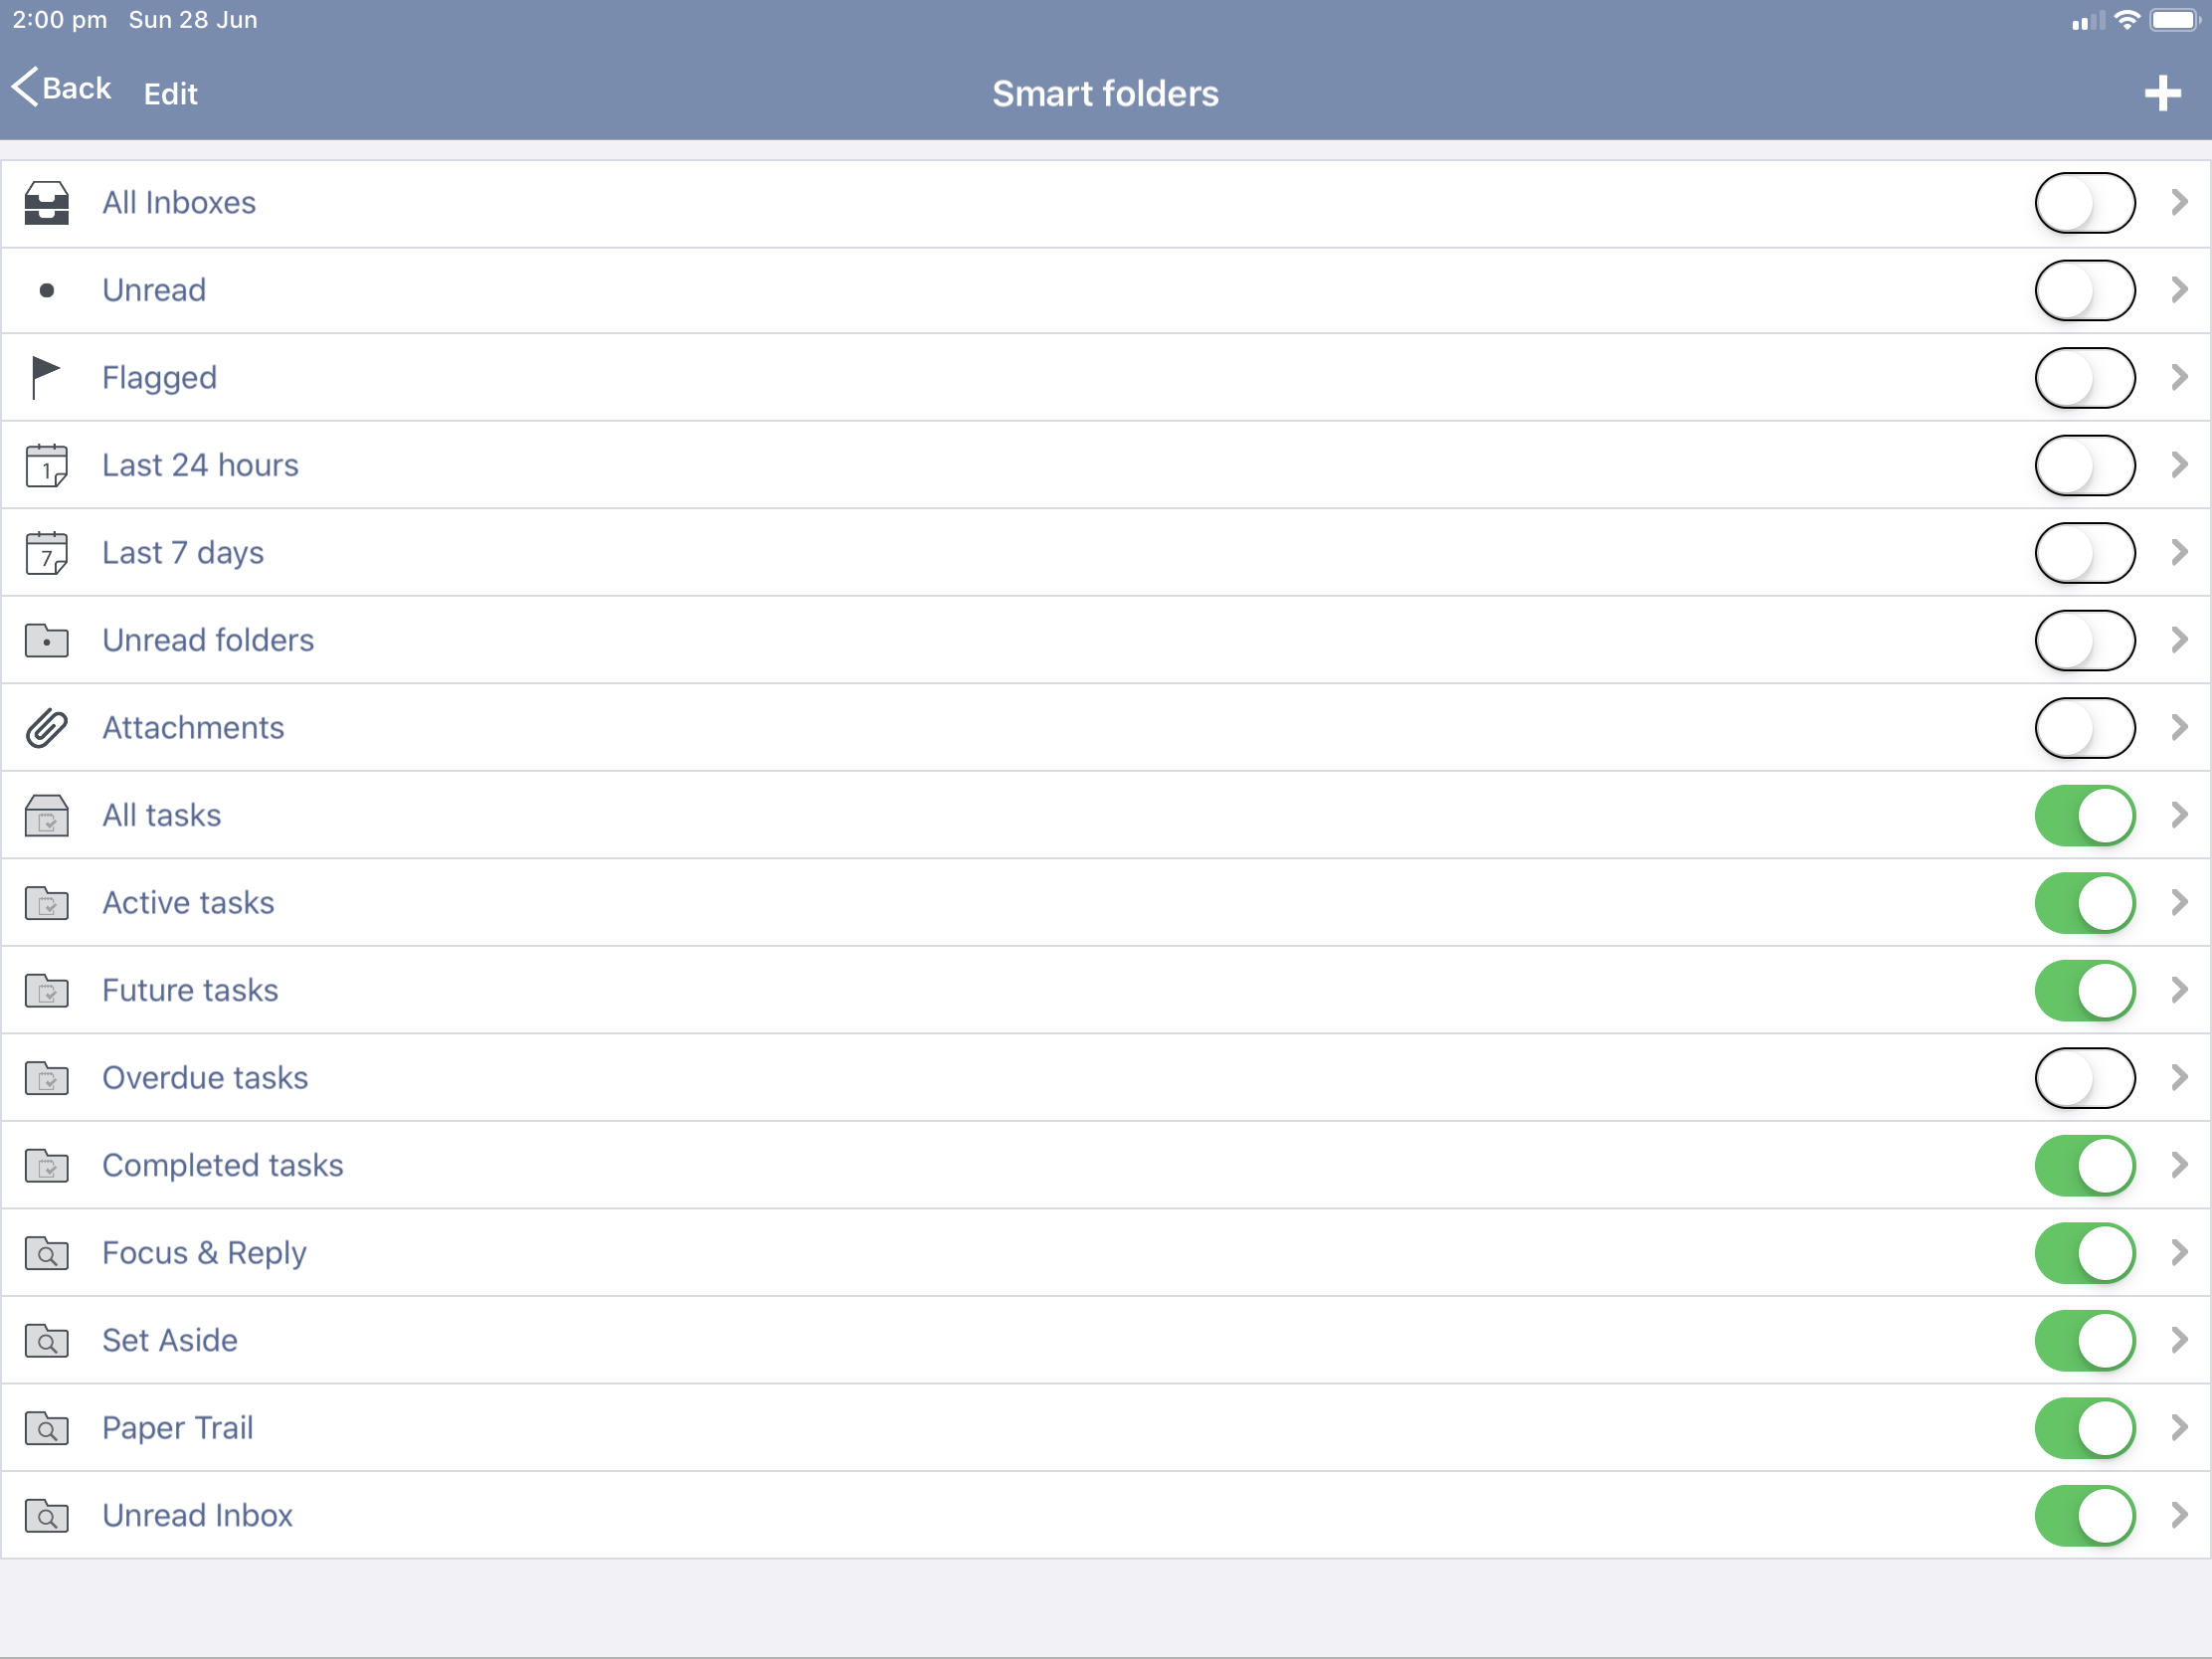
My Preside Configuration
You will note that a number of the folders have ‘snowflake’ icons next to them. That’s a feature of Preside, in that each folder can be assigned a ‘type’. So I’ve assigned each of my SaneBox-managed folders as a context. This means that Preside will check those folders in the same way that it checks the Inbox, meaning my unread counts are up-to-date.
This screenshot shows the representation of these folders within my IMAP structure:

Looking at this, I notice I haven’t configured my Paper Trail as a context. Maybe this is something I need to resolve.
The ‘Focus & Reply’ and ‘Set Aside’ buttons along the top bar of my Dashboard are saved searches. They look for emails that have an IMAP tag assigned to them. You might recall in my post about MailMate, I’ve set up a toolbar button that will add these tags to a chosen email. As these tags are synchronised at the server level via Fastmail, Preside can see them, and the tag can be used as a variable in a saved smart search folder, as I’ve done.
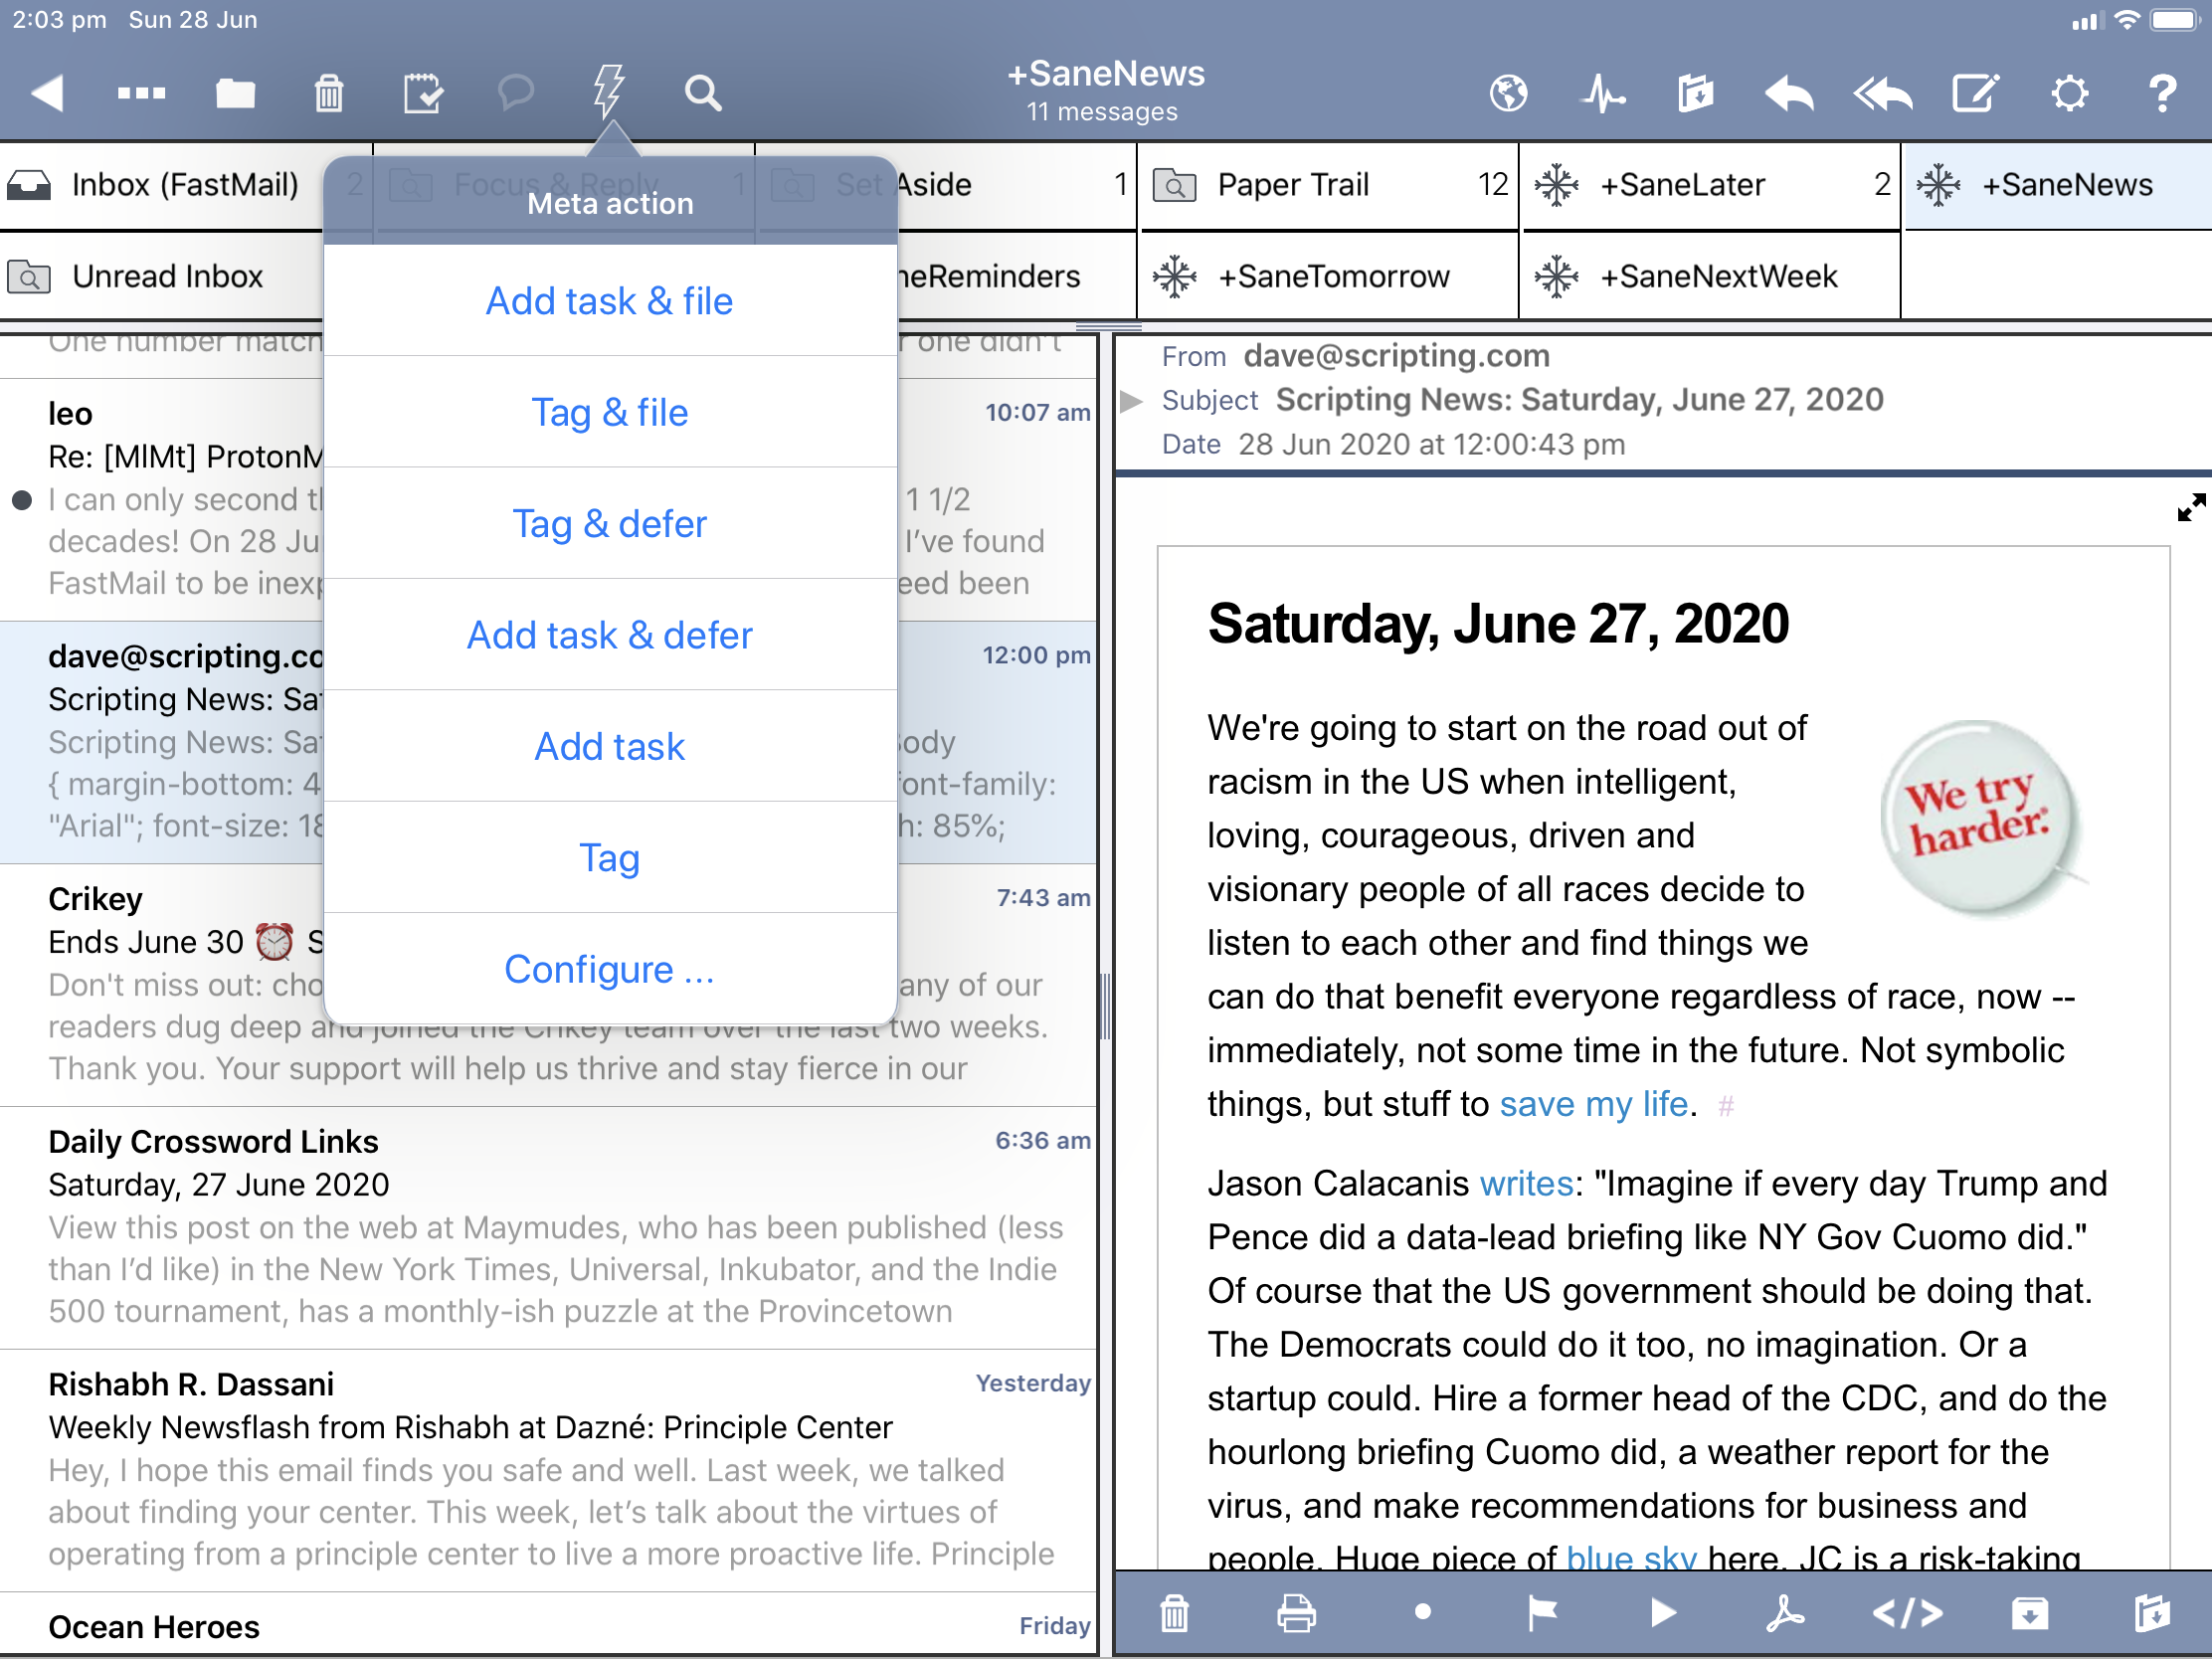
What is great about Preside is that it too can apply IMAP tags. I use the ‘lightning bolt’ quick action to do this. I highlight the mail I might wish to ‘Set Aside’ or ‘Focus & Reply’ and choose the ‘Tag’ option. This brings up a picker of IMAP tags that I can apply, so I just choose which one I want to use.
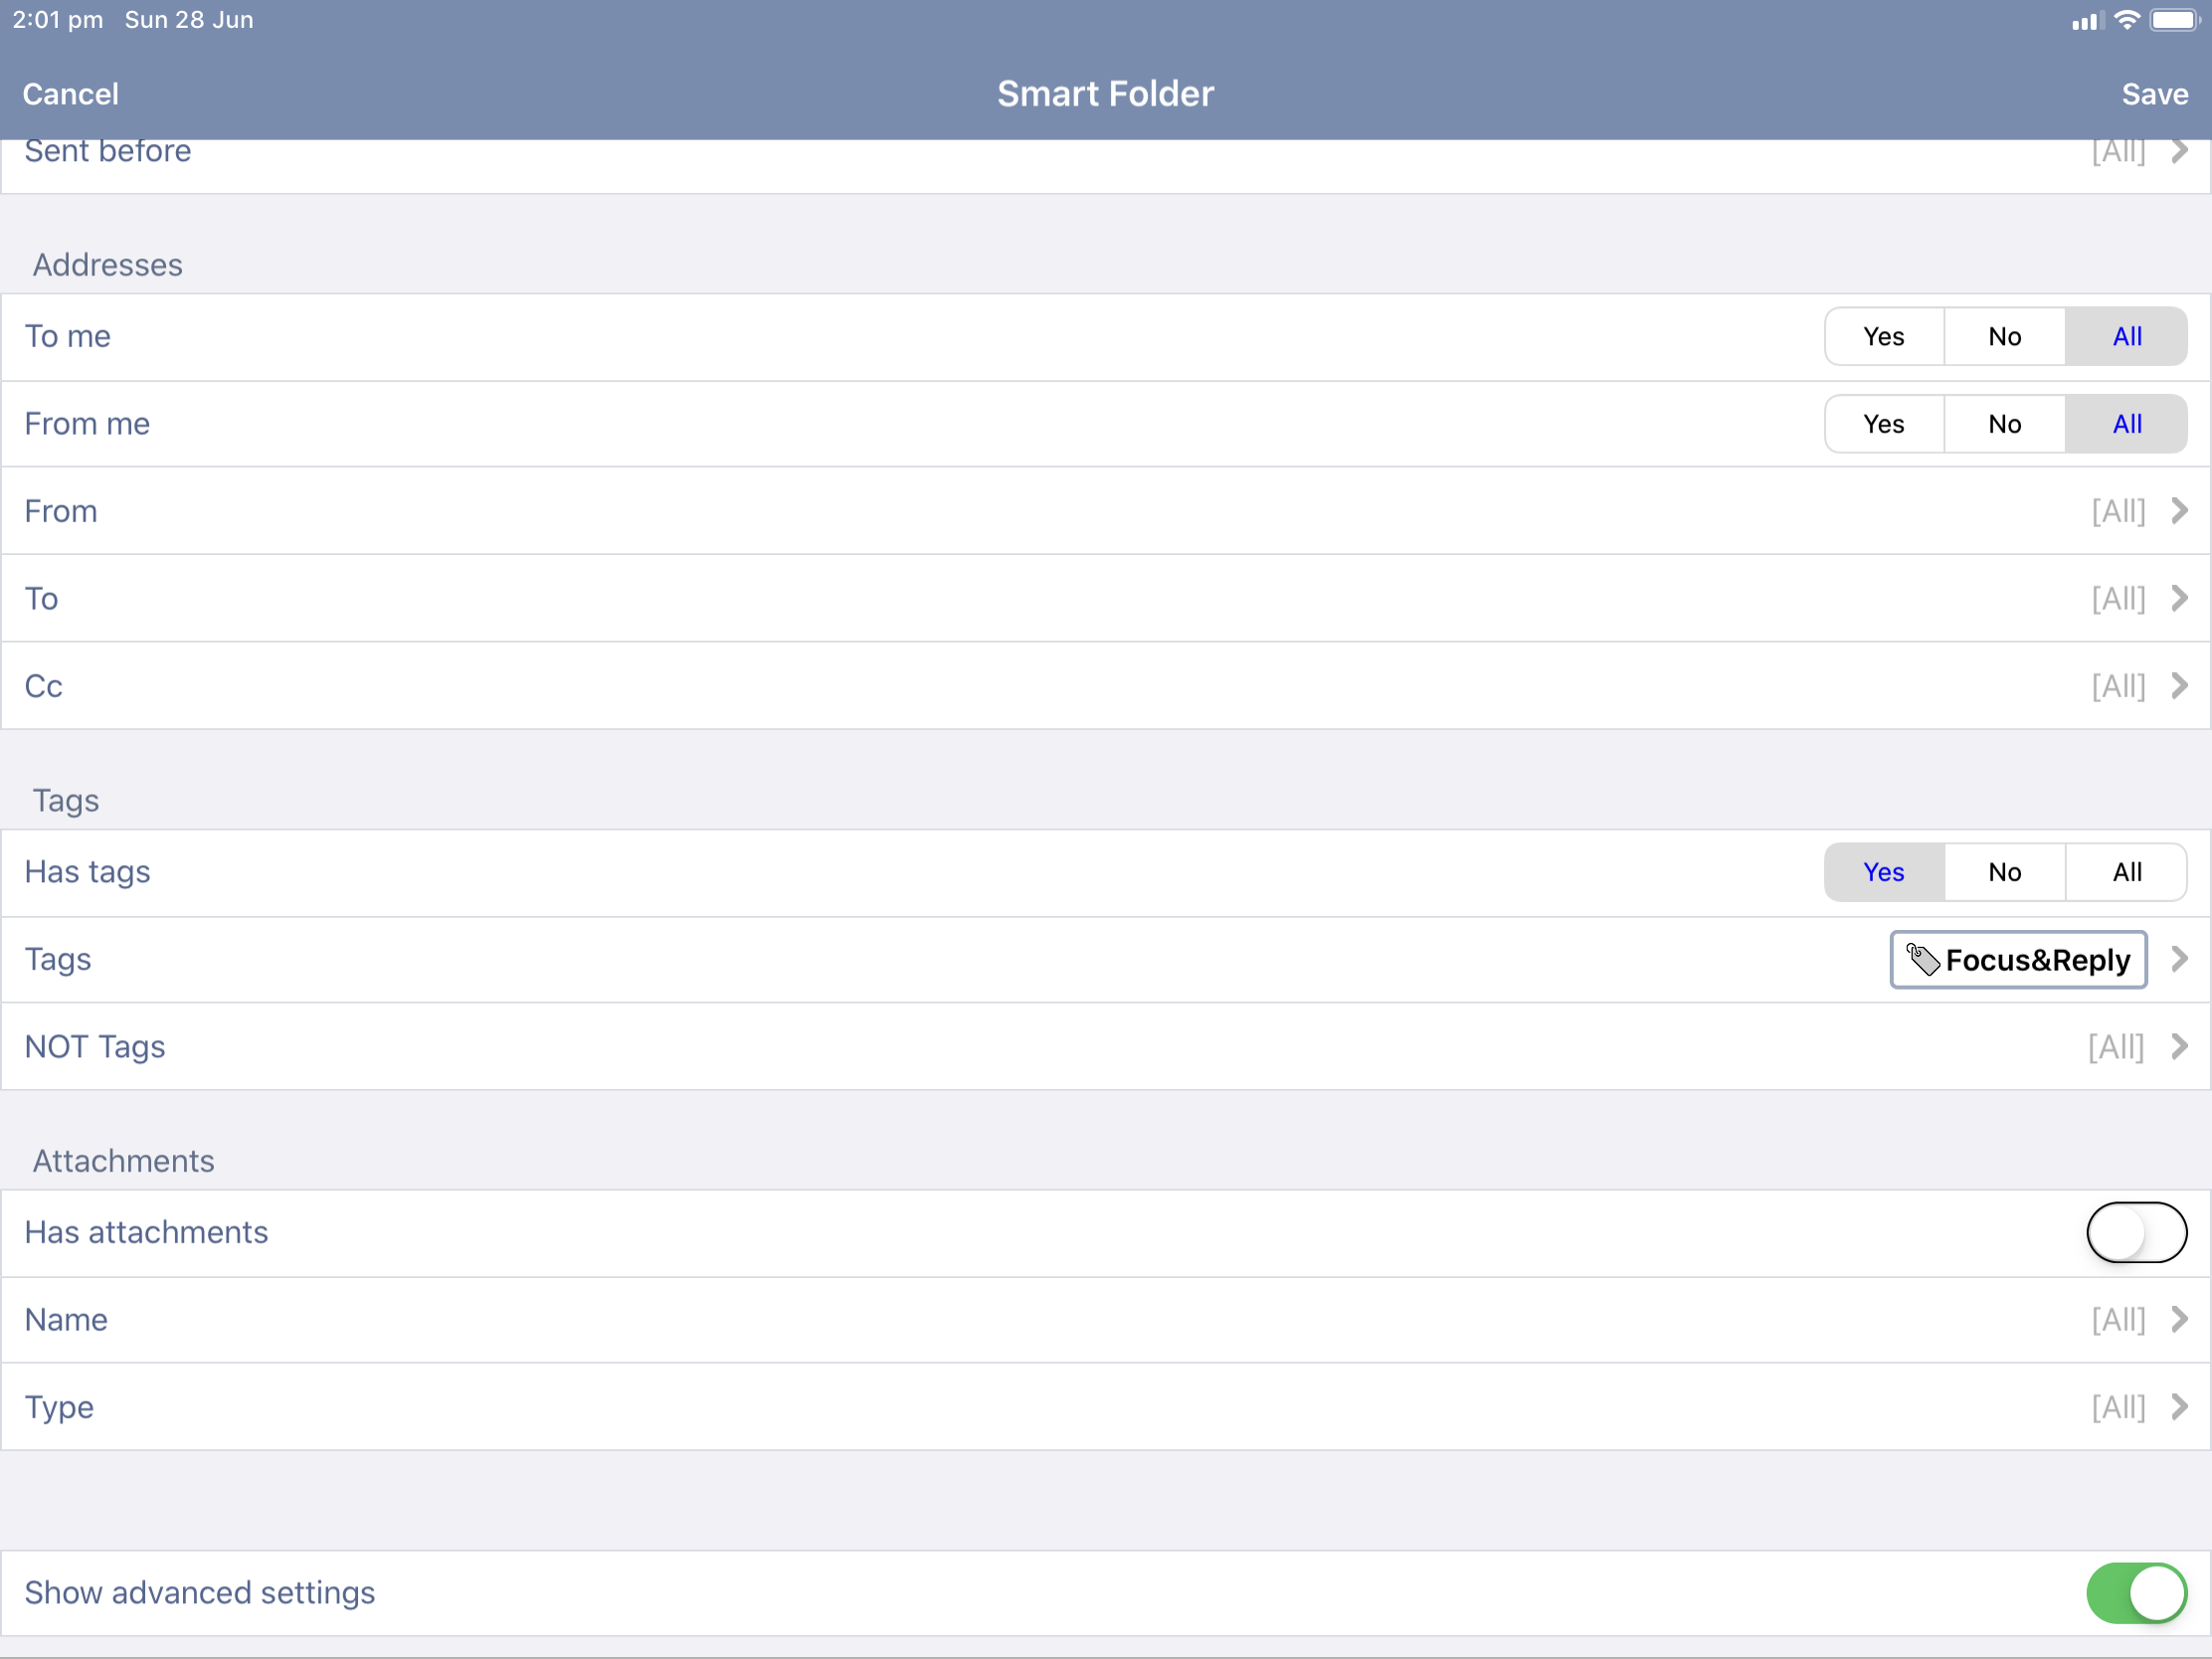
This is a snapshot into how the ‘Focus & Reply’ smart search was configured:
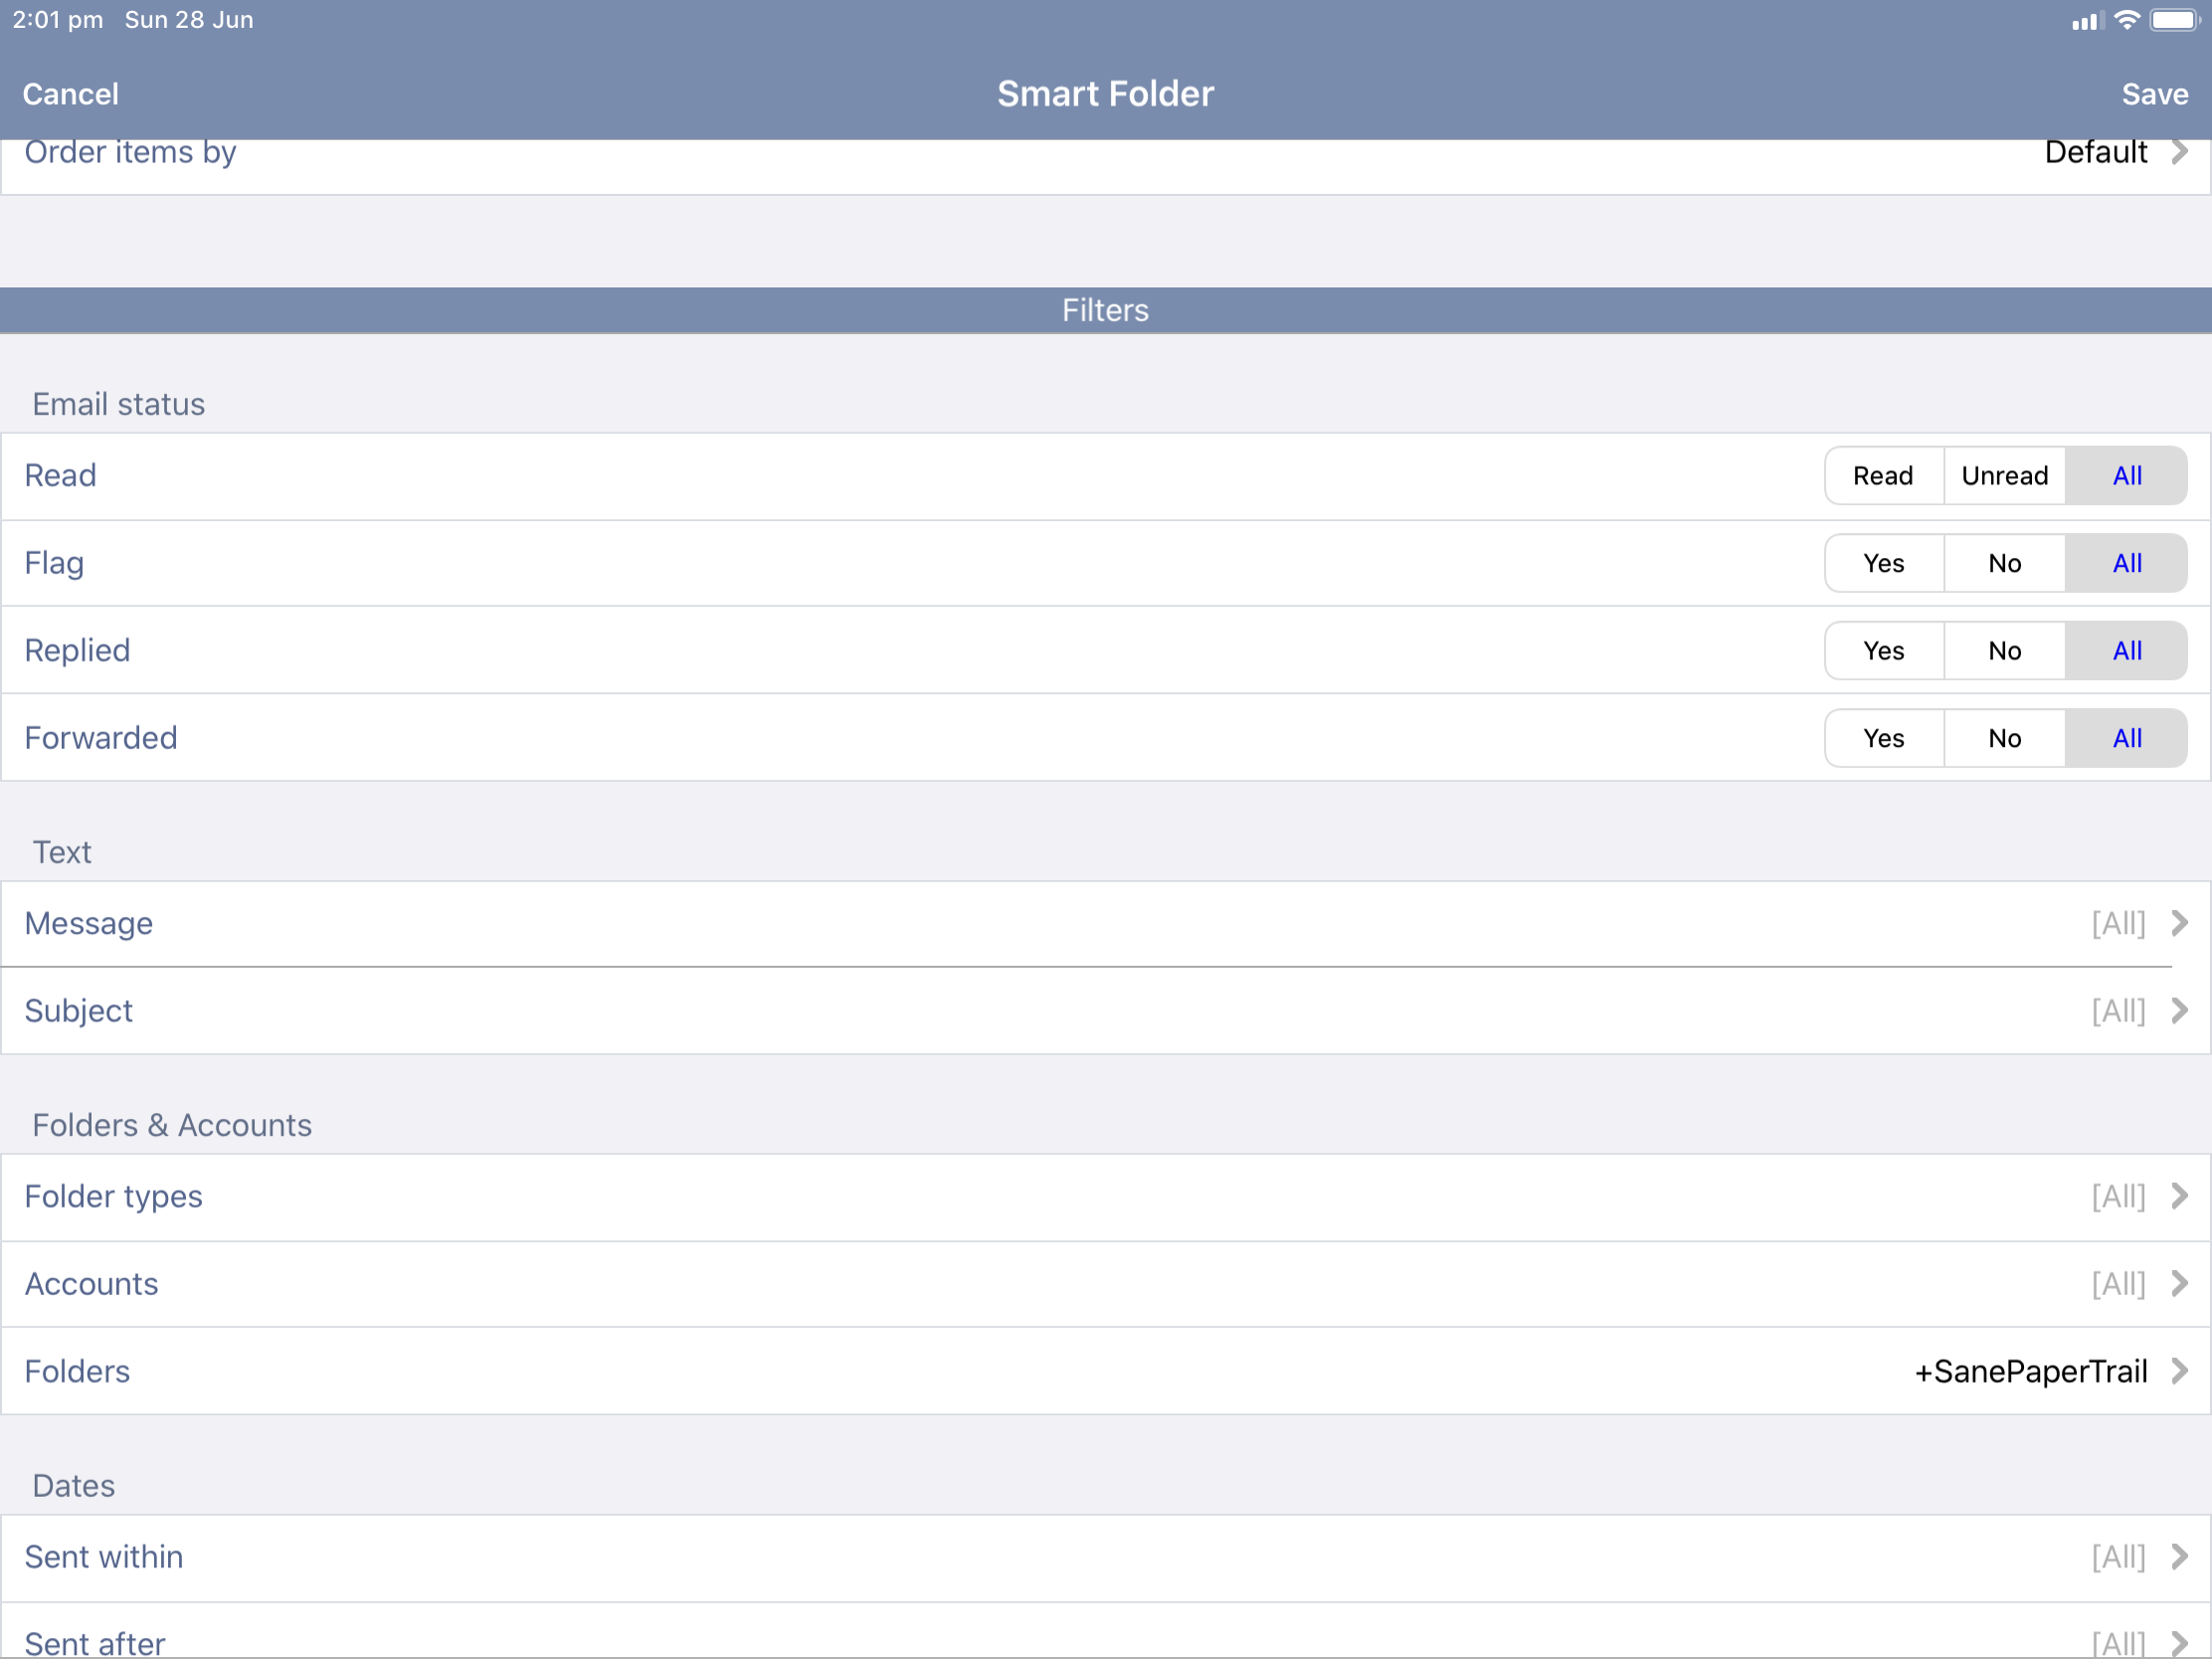
And here is an example of how I enabled a SaneBox-managed ‘Paper Trail’ folder to show:
Desktop Level Email Features on iPad
With this configured I feel I’m very close to the holy grail of a macOS level email workflow on iOS.
I’ve tried many email clients. Some are rudimentary (Outlook). Some are unreliable (Mail.app). Some have opinionated design and callbacks to their own servers (Spark). Some are ridiculously expensive (Superhuman).
Preside is easily the greatest, most complicated and somewhat ugly email client on iOS. It has grown on me the way an ugly dog might find a way into your heart. You know it isn’t cute, but darn it if it doesn’t sit when it’s told and bring the ball back every time. It’s an email application that can learn new tricks - then you look back and don’t remember how you taught it. I want to give Preside a good old tickle behind the ear.